Romper for a Toddler

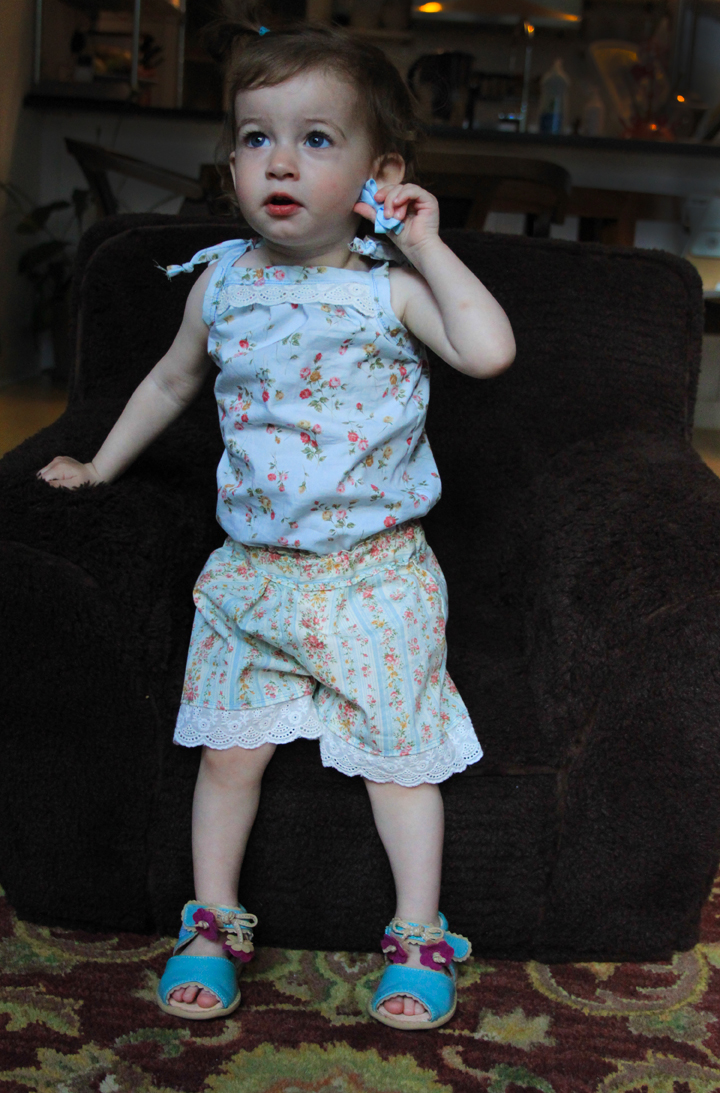
So I've said it before and I'll say it again, I am not a seamstress. I know how to sew a straight line with a sewing machine and that is about it. The pattern for this romper is a super simple pattern that mostly consists of getting good measurements of your child and drawing some rectangles. So please don't be intimidated by the adorableness of this romper. You can do it! I promise. Here are the step by step instructions for making this romper:
Supplies: Cotton fabric, lace, 1/4 inch elastic and 3/4 inch elastic
Take a look at the drawing I made of the romper and how I filled in my child's measurements here.

1. Use a pair of shorts that fit your child to draw out the shorts panels. Trace the bottom of the shorts but not the top. Use the measurement of your child's waist to figure the top. Here is how I figured my measurement for the waist. 19 inches (actual measurement) + 8 inches (extra length so the shorts will gather) + 1 inch (seam allowance) = 28 inches. Now divide 28 inches by 4 and you have the top measurement for each of the four shorts panels. In this case that comes to 7 inches. Measure out 7 inches at the top and draw a line. Now connect the top to the bottom of the shorts panels by bringing the side lines out diagonally.

Now cut out four matching panels, two front, two back.

Hem the bottom of each panel and add the lace. Now sew the shorts together and set aside.

2. Create the top of the romper. Measure your child's chest length and torso length to get the measurements for the top. This is my formula for the chest length: 19 inches (actual measurement) + 4 inches (extra length to create the gather at the top) + 1 inch seam allowance = 24 inches. For the torso length I used this formula: 9 inches (actual measurement) + 2 inches (extra length so the top blouses out) + 1 inch (seam allowance) = 12 inches. For the armholes I measure down 3 1/2 inches. For the back panel I subtracted 3 1/2 inches so it would meet at the bottom of the armhole and added 1/2 inch so I could make a hem for the elastic making the back 9 inches in length.

Create a gathered look at the top of the romper by pleating the top and sewing it under the lace and a piece of piping.

Make a hem at the top of the back panel and sew in a piece of elastic. I figured that if my child's actual chest measurement was 19 inches then I would divide that by half, 8 1/2 inches and subtract an inch and a half so the elastic would hold tight to her body, 7 inches.
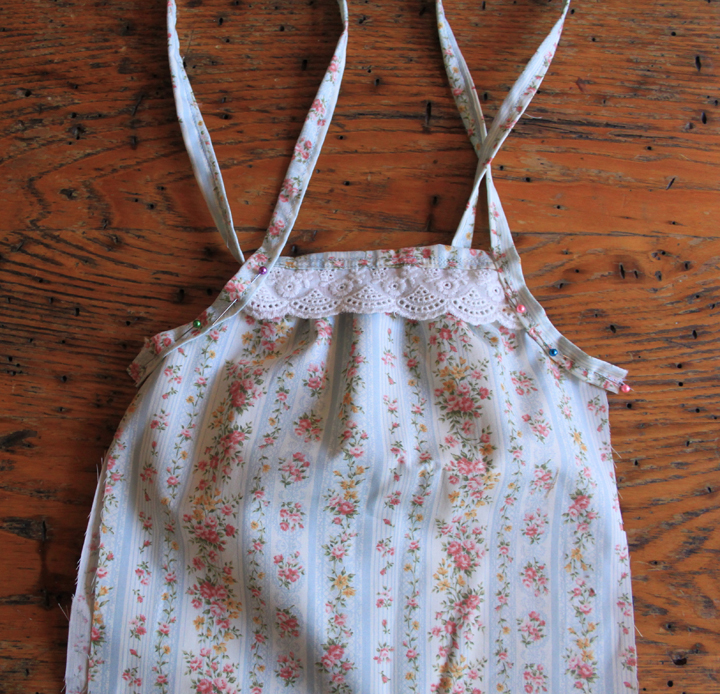

Create piping that is long enough to be able to tie in a bow at the shoulders and attach to the armholes and the back panel as shown in the photos above. Turn the front panel and back panel inside out so they face each other an sew the sides. Turn right side out.

3. Face the shorts to the top and sew them together. Create a strip of fabric that is large enough to house the 3/4 inch elastic. Hem the edges and then pin it to the romper and sew it on, leaving the back open so that you can run the elastic through. Cut a piece of elastic that is slightly shorter than your child's actual measurements. In my case I made mine 17 inches since her actual measurement was 19 inches. Run the elastic through the casing and then turn the back of the casing strip down and sew it shut.

