How to Make an Embroidered Pillow // Free Printables
Make this Embroidered Pillow for Yourself or for a Gift
Okay peeps. You know the drill. It's officially wedding season and time to get crackin' on some homemade, one-of-a-kind gifts. We've discussed my hatred of lame-o wedding presents in some of my previous DIY wedding gift blog posts like the Personalized Tea Towel and Monogrammed Dinner Napkins. So you know how I feel about trying to keep it real and express your love for your friends while giving them a gift they won't be selling at a garage sale in five years.
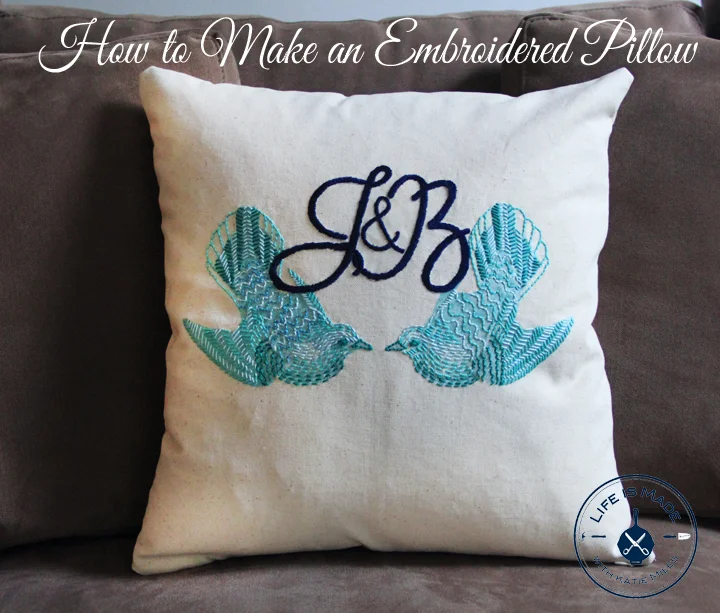
I made this embroidered pillow for my good friends, Joe and Beth, who tied the not a couple of weeks ago in GORGEOUS central coast California. They were beautiful, the wedding was beautiful, the location was beautiful. So you better believe I wasn't going to show up to that magazine perfect wedding with some boring ass coffee maker. No way. They are some of my best friends, and I really wanted them to know how much they mean to me and how happy I am to see them making such a huge commitment to each other.
Follow my instructions below to make your very own monogrammed, turtledove pillow and show up to your next wedding like you mean it.
Supplies:
- canvas or linen cut to fit the pillow you are using, add a half inch seam allowance on all sides
- DMC number 5 Embroidery Floss
- DMC number 5 embroidery needle
- pillow--14 x 14, 16 x16 or 18 x18
- invisible zipper the same size as the pillow
- straight pins
- monogram created in your program of choice
- free printable turtledoves

1. Create the initials you want to use for the monogramming in Microsoft Word, Adobe Illustrator or program of your choice. Reverse the monogram so it is a mirror image. Print the monogram onto the Avery Fabric Transfer paper. Use the downloads for the turtledoves that I provided and print on the Avery Transfer Paper. Follow your printer's instructions for loading the paper. (You can also print the monogram out on regular paper, tape it and the fabric to a window and use the light from the window to trace the monogram onto the fabric.)

2. Carefully cut out each image using an exacto knife. Place the birds on the fabric face down and follow the instructions that come with the Avery Transfer Paper for ironing the birds onto the fabric. Press hard with the iron and leave the iron on the transfer for at least one minute. Allow to cool before removing the backing.

3. Place the monogram on the fabric. Iron the monogram onto the fabric being careful NOT TO TOUCH THE BIRDS WITH THE IRON. The bird transfer will stick to the hot iron. If this step seems too tedious for you, you can follow the instructions in step 1 for tracing the monogram onto the fabric.


4. Use the satin stitch to fill in the monogram. Use the backstitch and any other stitch you wish to use to embroider the turtledove birds.


5. Iron the invisible zipper, separating the teeth from the fabric and ironing as flat as possible. Place the zipper on the face of the fabric about 1/2 inch from the edge with the zipper facing down and the teeth pointing up. Pin the zipper down.

6. Baste the zipper down. Change the foot on your sewing machine to a zipper foot and sew the zipper down stitching as close to the teeth as possible.


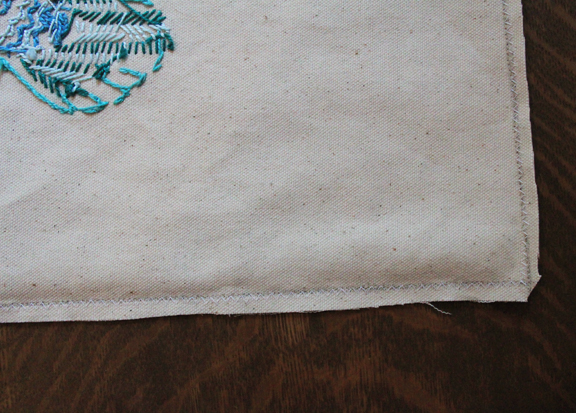
7. Repeat this process on the fabric of the back side of the pillow. Then sew the edges of the invisible zipper down with a zig zag stitch.

8. Sew the rest of the seams of the pillow. Sew first with a straight stitch, then with a zig zag stitch, just to the right of the straight stitch. Sew over the edges of the invisible zipper on each side. Cut a diagonal cut on each corner of the pillow. Turn right side out and stuff the pillow into the case.