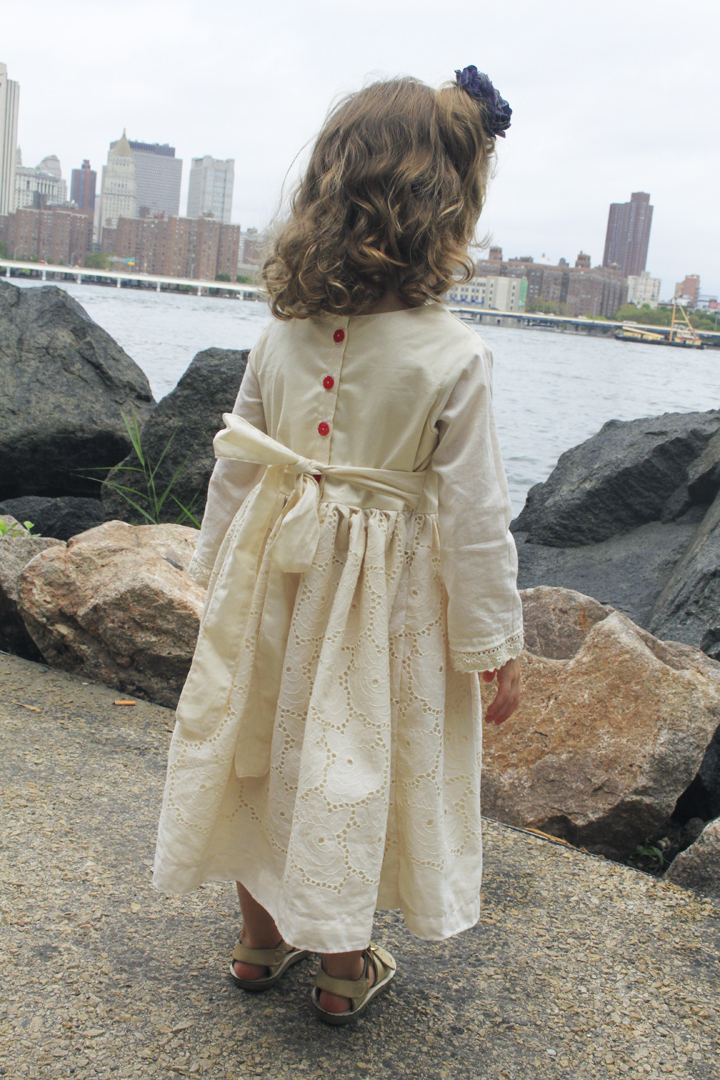
The Ruby Rose Dress Tutorial

How to make this red rose dress // Life is Made with Katie Miles // www.lifeismade.com
Tutorial for the Ruby Rose Dress with FREE Patterns
Phew! Sorry for the brief hiatus I've taken from posting on the blog, but this one took FOREVER to make! And.... I've been busy. Busy with what you ask? Dealing with a psychotic two year old who had two weeks in between summer camp and preschool and who has decided that napping is unnecessary. So Momma's days were busy entertaining, breathing through overtired temper tantrums and drinking cocktails when she was finally in bed to numb the pain. Anyway...I did manage to get this dress made in the few spare minutes I had here and there and I'm oh so glad I did because I feel like it just might be the best thing I've ever sewn. What do you think? Should I market it or what?!? Well, in case I never get around to making a few to sell because I'm too busy breathing through temper tantrums and drinking, I've made this tutorial so you can make your own if it strikes your fancy.
Supplies:
- FREE 2T and 3T patterns (see direction #1 for links)
- 1 yards of cream (or color of your choice) cotton fabric
- 2 yards of lining fabric
- 2 yards of lace like fabric for the skirt
- Crocheted lace for the sleeves
- 4 buttons
- Embroidery floss, DMC 28
- Embroidery needle
- Embroidery hoop
- Carbon transfer paper
- ball point pen

How to make this red rose dress // Life is Made with Katie Miles // www.lifeismade.com
1. Print and use my free patterns to trace the front torso onto a piece of fabric. The front panel is split in half so it would fit on a printable 8 1/2 x 11 piece of paper.
2T and 3T pattern for the front torso of the Ruby Dress.
2T and 3T pattern for the back torso of the Ruby Dress.
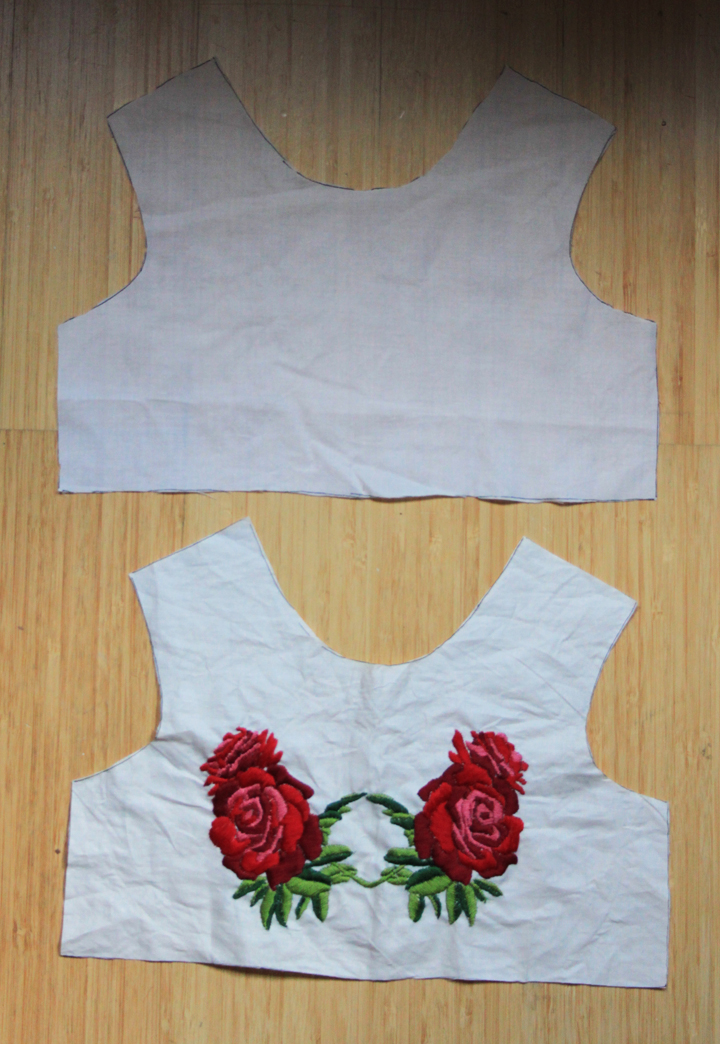
2. Do not cut the front panel of the dress out of the fabric. Instead draw a rectangle around the traced panel and cut the rectangle out. Use the rose pattern below (you can print it by clicking here) for the embroidery. Use carbon transfer paper and a ball point pen to transfer the roses to the front panel. You can buy carbon transfer paper from Amazon by clicking here.

3. Embroider the roses onto the fabric using a satin stitch.


4. Cut the embroidered front panel out and cut another front panel out of the lining fabric.
5. Cut 2 back panels out of the outer fabric and 2 out of the lining fabric.

6. Use a garment that fits your child to measure the length of the sleeves. Then use the front and back panels to trace the armhole at the top of the sleeve. You can cut two sleeve panels out and sew them together, or you can trace around the panel, flip over and trace again so you have one sleeve panel that will be sewed only at the bottom seam.

7. Make the tie for the bow in the back. Cut 4 rectangles that are 2 inches by 26 inches. Sew two of the rectangles together leave one end seam open. Turn right side out and press with the iron. Sew the one more straight stitch along the seams. This will keep the ties from getting all wonky in the wash.


8. Pin the front panel and back panel the lining fabric face to face. Pin the neckline. Sew a straight stitch along the neckline. Turn right side out. Press with the iron along the seam and sew another straight stitch along the seam just like you did with the ties.


9. Fold the back panels 3/4 inch and then again 3/4 inch. Press with the iron and pin. Sew a straight stitch along the edges of the folded seams.

10. Measure the buttons evenly and then sew them on. Then place the two halves of the back panel together and make a small dot with a pen where the button hole should go on the corresponding panel. Use the sewing machine to make the button holes.

11. Place the front and back panels face to face and pin the shoulders. Sew a straight stitch at the shoulder seam and then a zig-zag stitch to prevent fraying.

12. Pin the sleeves in place at the should seam and then sew the sleeves in using a straight stitch and then a zig-zag stitch.


13. Fold the ends of the sleeves 1/4 of an inch and press with an iron. Pin the lace on the inside of the sleeves along the folded edge. Use a straight stitch to sew the lace onto the end of the sleeve.
14. 2T: Cut two 36 x 17 1/2 rectangles out of the outer fabric and two 36 x 16 1/2 rectangles out of the lining fabric.
3T: Cut two 36 x 14 1/2 rectangles out of the outer fabric and two 36 x 13 1/2 rectangles out of the lining fabric.
15. Hem all the rectangles. Place the outer fabric over the lining fabric, both face up, and pin about 1 1/2 inches from the top seam. Set your machine to the longest stitch length and sew a basting straight stitch along the top seam about 1/2 inch from the top of the fabric. Leave the strings hanging out a few inches on both sides. Pull on one of the strings on both sides and gather the fabric toward the middle.

16. Pin the top panel to the skirt face to face. Sew them together using a straight stitch and then a zig-zag stitch. Remove the basting stitch. Repeat on the other side of the garment.


17. Now pin and then sew the garment on both sides starting at the sleeve and ending at the bottom of the skirt. Don't forget to pin the ties in at the waist. You will want to pin them into the waist seam so that the length of the tie is in the inside of the garment and the side of the ties that was not sew is hanging out of the waist seam where you can see it. Sew a straight stitch and then a zig-zag stitch.
